Eyevan – an interactive installation

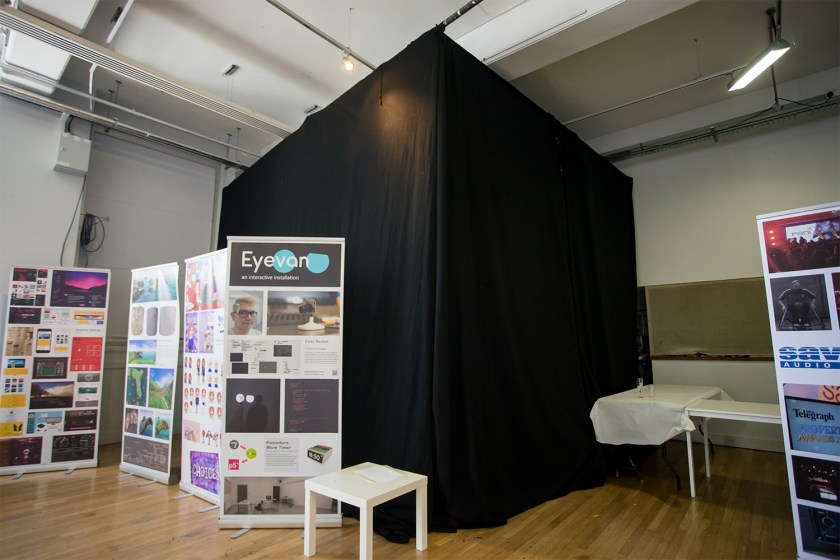
“Eyevan” is a multi-disciplinary work created as part of my university dissertation with the aim of investigating if an interactive installation can be affective.

cc59484405dc2b98dcb9a9710c7c8ea0

The installation involves using cycling74’s Max software for blob tracking, and a javascript library called p5.js to render the output.

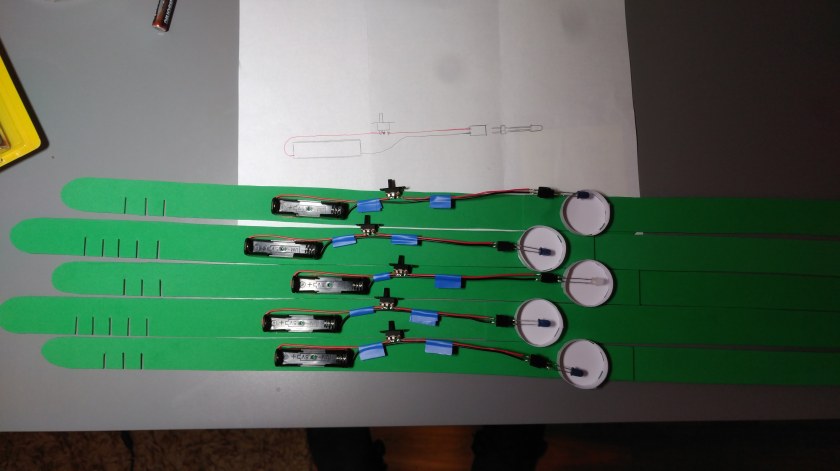
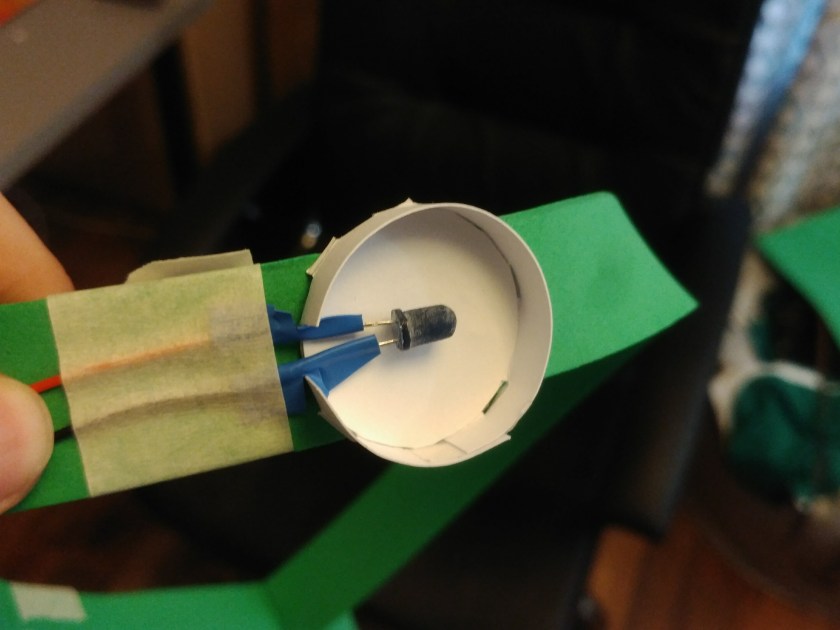
The user(s) – up to 3 people at a time, wear headbands with infrared LEDs on them and a camera with an IR pass filter installed internally produces an image that is trackable with Max. This tracking info is then send to the JS running in the browser using socket.io as a bridge.

A webapp is running in the browser from a local node server, this is where the p5.js library is used. Programmable shapes allow the eyes to be animated programmatically an respond to the people in the room. The eyes in this case have no inherit emotions of their own, because the eyes have a low level of visual detail it is the user themselves who applies the emotion to the eyes as they are viewing them. Therefor the installation is affective.

As part of this project I compared 2D and 3D animating techniques for the eyes. p5.js has 3D rendering capabilities utilizing webGL. This determined that 2D made more sense for the desired outcome and was easier to animate in the desired way.

I wanted to challenge myself with this project, at the begining when I was pitching the concept to the rest of my class I had a sort or idea of how I would make each part and what software I’d use but nothing concrete. I enjoyed learning to use p5.js and max in new ways and was rewarded with a great feeling when everything eventually worked.

A part of this project that I didn’t imagine would be as big a part was the computer vision element. I ended up removing the IR cut filter from an xbox camera and replacing it with a piece of LEE 87 IR pass filter material to create a camera that could see the IR LEDs in the headbands mentioned before. see this other post for more on that

Maybe at some point I’ll make the code available here or on github, I’d need to tidy everything, especially the max patch.

A mention need to go to this github repo where I found the solution to getting data from max into javascript in an open browser window.

installation1
Inside a curtained off area in which the installation was run properly for the first time
installation2
the curtained off corner where Eyevan was presented
IMG_20180523_221043
one of the IR tracking headbands
IMG_20180503_191052
all 5 headbands completed
IMG_20180426_191726
a sanded LED inside the paper reflector
DSC03989
the almost reassembled camera
DSC03988
the naked camera PCB with lens attatched
goofing around with 3D eyes
early testing of the 3D eyes
eye geometry diagram-01-01
The parameters of the arc() shape that is used to render the eyes. The shape and its cut out are controlled and animated from scratch using variables.

IR modifying an xbox camera

Comprehensively breaking a logitech webcam trying to remove the IR filter before doing what should have been done in the first place.

This slideshow requires JavaScript.

After looking at a guide online for how to IR modify the Logitech C270 webcam I thought all it would take was a little heat to melt the glue. As it turns out n my newer model of the device the filter is fused to the sensor meaning my attempt to remove the glass brought the entire sensor with it.

This slideshow requires JavaScript.

Xbox vision cameras are known for being easy to remove the IR filter from. They are popular with astral imaging enthusiasts for attaching to telescopes. The small IR cut filter is in the lens in front of the sensor and can simply by pried out.

The only other modification I think will be necessary is to do something about the 4 green LEDs that illuminate the ring around the lens  when the camera is in use.

Simply googling “IR modify [insert webcam model here]” was how I found the appropriate steps for these mods.

What is a harvest mouse really thinking?

A one page coding experiment

This idea came to me in a dream…

Actually I woke up having only just been dreaming about something I know not what and the only part of that dream still in my mind was a concept of mice wandering over a computer keyboard and everything they typed being turned into the word “harvest”. Weird, I know.

So I stuck this down on a post it note as it seemed like an interesting coding exercise.

postit

For this post I’ll simply focus on what I needed to learn in order to make this work, text parsing in javascript.

z5exeqg
source

Using recently gained knowledge about selecting elements in the DOM combined with this post on stack overflow. This was found by searching along the lines of “removing the last word from a string javascript”, because efficient googling is a very undervalued skill at present.

I also like to put as much work down on a whiteboard as possible before starting to code. I’ve sketched out the html elements and made a to-do list of sorts. Originally I thought I’d be using an <input> element however I ended up using a <textarea>.

42b65a27cd2549d2a2316722848b0b67

7f070d0e351056ebdb3a5a4ab68dde30
the to-do list on the whiteboard then translates into the code building

Information about keyboard presses as DOM events was also found here.

The entire project can be accessed here: on github

And used here thanks to GitHub pages, which is a recent and amazing discovery: Rich Harvest. NOTE: there is no support for mobile yet, I’ve branched the project with that addition in mind.

The only problem I ran into was with editing the content (or .value) of the <textarea> as a static variable instead of as live DOM element.

Pretty fun one-page web project, 10/10, would harvest again.


Art Geko


Art Geko? Art Deco? …

Inspirations:

https://www.instagram.com/p/BdBVL14Fpjd/

Process:

Spotify’s promotional and social media material, especially their in-feed adverts for 3 months premium membership for £9.99, has a look that involves shapes and “bold” colours. Not huge colours but eye catching at least.
It was the squiggly line especially that got me wondering how I would make them in illustrator…? So I used adobe illustrator and threw shapes at an artboard till it looked good, and while I was doing that I looked at the colours I was pulling from adobes color website and thinking what i would look like if the hue was animated in after effects as I’ve tried this during other projects in the past.

illustrator screenshot

So I pulled the finished image into Photoshop and added a hue/saturation adjustment layer.

animated hue
apologies for low image quality
numero uno
The final image – currently the header image for this site (this may have changed at time of reading)

While the image was in Photoshop I tried making it black and white as I was curious what it might look like with a single colour overlay. Then after trying a gradient map adjustment layer it seems as thought the base image could be adapted to suit any theme on a site or for a brand for example.

BandW
Black and White just using the default Photoshop black and white adjustment layer preset


I intend to experiment more with this style in the future and would like to find out if I can increase the aesthetic quality by adjusting the positioning of the shapes or what shapes are used etc… There really are a million options for this style.